
値が入ってない場合エラーメッセージが表示されるカスタム画面フローロングテキストエリア項目を作成します。Aura コンポーネントでバリデーション追加方法を紹介できればと思います。
概要
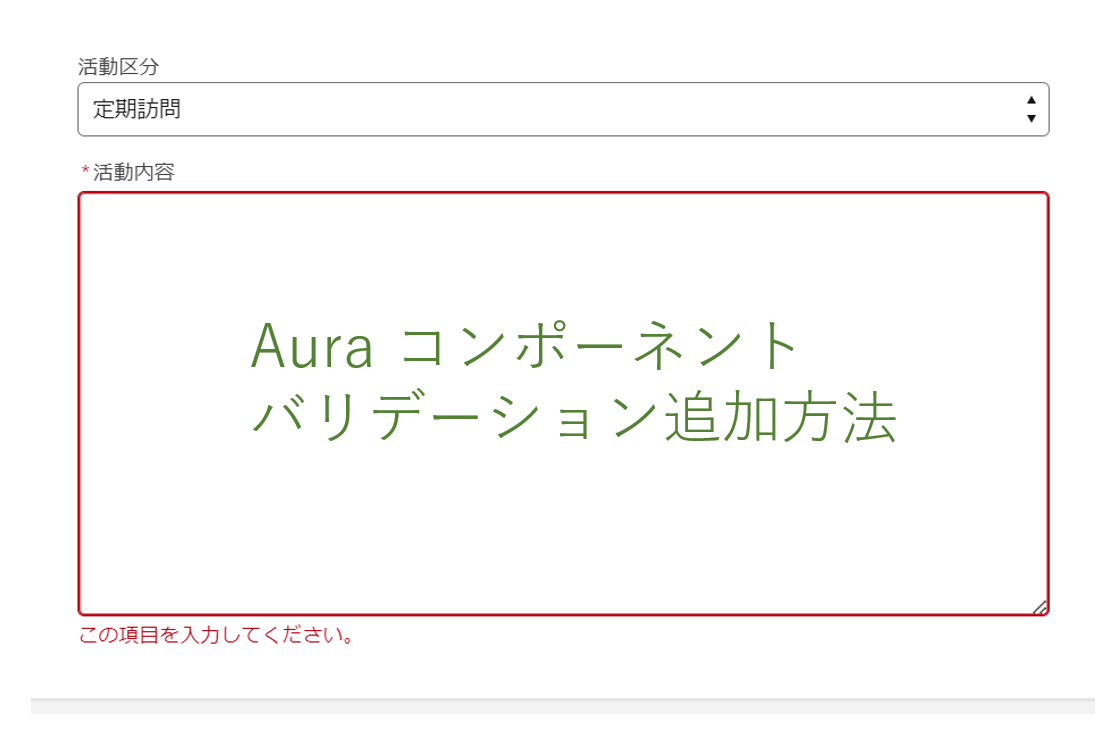
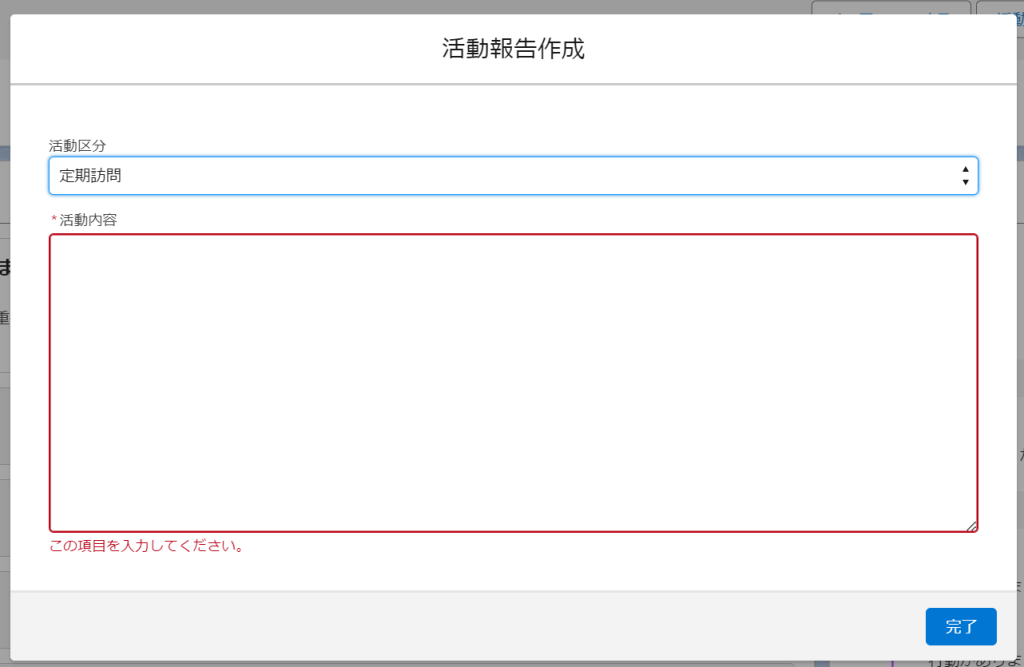
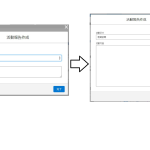
前の投稿に画面フローでのロングテキストエリアのデフォルト表示行数を変える方法を紹介しました。今回はそのロングテキストエリアを必須にする(値が入ってない場合エラーメッセージを表示)設定方法を教えます。
結果イメージ↓
コンポーネント作成手順
システム管理者のSalesforce 画面の右上にある設定アイコンをおして開発者コンソールを開きます。
ファイル / 新規 / Lightning Component を選択します。
Name のところにCustomLongTextAreaCmpを入力します。(自分の項目に反映する名前を付けてください。)
CustomLongTextAreaCmp.cmpに以下のコードを入れます。
<aura:component implements="lightning:availableForFlowScreens">
    <aura:attribute name="label" type="String" default="" description="The label of the text area input" />
    <aura:attribute name="value" type="String" default="" description="The value of the text area input" />

    <aura:handler name="init" value="{! this}" action="{!c.doInit}"/>
    <aura:attribute name="validate" type="Aura.Action" />

    <div>
        <lightning:textarea aura:id="textareaInputCmp"
                            label="{!v.label}"
                            value="{!v.value}"
                            required="true"
                            class="custom-text-area"
                            onchange="{!c.handleValueChange}"/>
    </div>
</aura:component>CustomLongTextAreaCmpController.jsに以下のコードを入れます。
({
    doInit: function(component, event, helper) {
        component.set('v.validate', function() {
            var timeInput = component.get('v.value');
            var missing = [];
            if(!timeInput){
                missing.push('Missing');
                sessionStorage.setItem('missing', missing);
                return {
                    isValid: false,
                    errorMessage: ''
                };
            }else {
            	sessionStorage.removeItem('missing');
        	}
       });
    },

    handleValueChange: function(component, event, helper) {
        var newValue = event.getParam("value");
        component.set("v.value", newValue);
    }
})画面フローで「次へ」を押すと過去の画面の動きがなくなったためその状態を保存するようにブラウザの sessionStorage を利用しました。
CustomLongTextAreaCmpHelper.jsに以下のコードを入れます。
helper.js の中に表示したいエラーメッセージを自由に変えられます。
({
    displayErrorMessage : function(component){
        var missing = sessionStorage.getItem('missing');
        if(missing != null) {
            var compElement = component.find("textareaInputCmp");
            if(!$A.util.isUndefined(compElement)){
               compElement.setCustomValidity('この項目を入力してください。');
               compElement.reportValidity();
            }
        }
    },
})CustomLongTextAreaCmpRenderer.jsに以下のコードを入れます。
({
    afterRender: function(component, helper) {
        this.superAfterRender();
        // 画面上にエラーメッセージを表示する
        if(sessionStorage){
            helper.displayErrorMessage(component);
        }
    }
})CustomLongTextAreaCmp.cssに以下のコードを入れます。
.THIS textarea{
    --slds-c-textarea-sizing-min-height: 250px;
}CustomLongTextAreaCmp.designに以下のコードを入れます。
<design:component>
  <design:attribute name="label" label="label" />
	<design:attribute name="value" label="value" />
</design:component>コンポーネント作成は終わりです。次は画面フローのところに設定だけ残ります。
画面フロー設定手順
今回作成したロングテキストエリア項目は複数場所で利用することができます。利用したい画面フローの画面コンポーネントを開いて以下の通り設定してください。
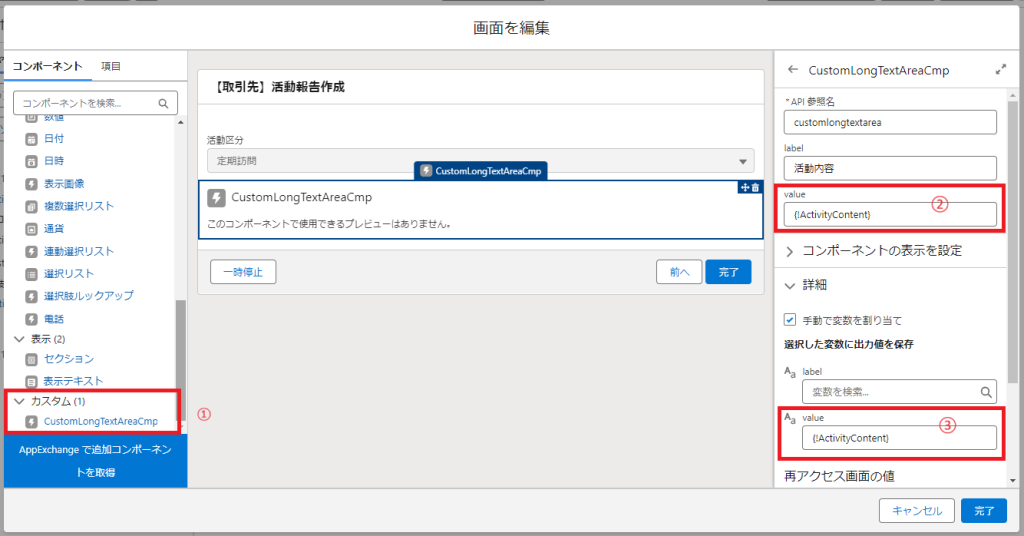
① カスタムロングテキストエリア項目を標準のロングテキストエリアに交換します。
② 画面が開いた時デフォルトで表示したい値のテキスト変数を設定します。
③ 値に何が変更がある時変更した内容を次のステップに使うため変数を設定します。
label とAPI参照名に自分が設定したい文字列を入れます。
画面フローの設定が終わったら保存と有効化して動きを確認してください。
最後に
Salesforce の画面フローでカスタムで作成したAuraコンポーネントに必須とバリデーションの設定方法を紹介しました。値が入ってない場合エラーメッセージが表示されます。

コメントを残す